The level generation in Golden Krone Hotel has kind of sucked for a while.
For the 7drl version, I wrote a quick and dirty level gen system. It could make connected rooms and hallways, true, but the results were really kludgy looking. Rooms would overlap each other willy nilly. Hallways would be ridiculously long. Sometimes the levels would be much too small. They also tended to be very boxy (due to a very naive sunlight implementation).
Later I swapped in ROT.js map generation algorithms and for a time things seemed rather decent.
There were still a few quirks with the ROT.js maps though. Way too many hallways for one. The hallways often looped in on themselves and players were well aware of it. Dead ends appeared too often. And of course, using a simple level generation algorithm produces a bunch of samey levels.
The last straw was when I took screenshots of each level. At first, I thought the result was pretty cool. But the more I looked at it (and compared to the amazing diversity of maps in DCSS), the more I hated my crappy level generation.

Prefabs to the rescue.
OK, so it was clear I would need a new level generator. I had been hearing tons of chatter about “prefabs” (hand crafted map components). Josh Ge has a bunch of posts on them and I found this talk by Jim Shepard particularly great.
So maybe the time was right to finally start utilizing them. Hmmm… prefabs sounded cool but damn complicated. How would I design prefabs and how the hell would the algorithm fit them into the rest of a level? Was this huge detour into rewriting a working system even worth it?
Spoilers: it was.
Let’s go over all the benefits that were realized by incorporating prefabs. Then we’ll cover how it works in detail.
It helped massively with the tutorial
Tutorials are sort of a nightmare. You have to plan for every contingency, every single way the player could screw themselves. It’s not impossible to have a procedurally generated tutorial, but I certainly wouldn’t try it. Instead the tutorial is one giant prefab.
Levels are less boring
My main goal was simply to make levels less boring. That was pretty easily achieved by having rooms that extended beyond rectangles: triangles, diamonds, crosses, circles (no worries, rectangle fans, we still got you covered). Even better than generating new room shapes is creating interesting encounters like a monster closet or a room with pits surrounding an item.
Branches actually feel unique
Branches play a very important role in roguelikes: breaking up the monotony of regular floors. To give players a proper break, it’s vital to make branches feel distinct from the regular dungeon and from each other. There are many tools to distinguish branches: monsters, music, floor and wall tiles. I was using all those, but without distinct map styles, branches in Golden Krone Hotel were still feeling too much like palette swaps of regular floors.
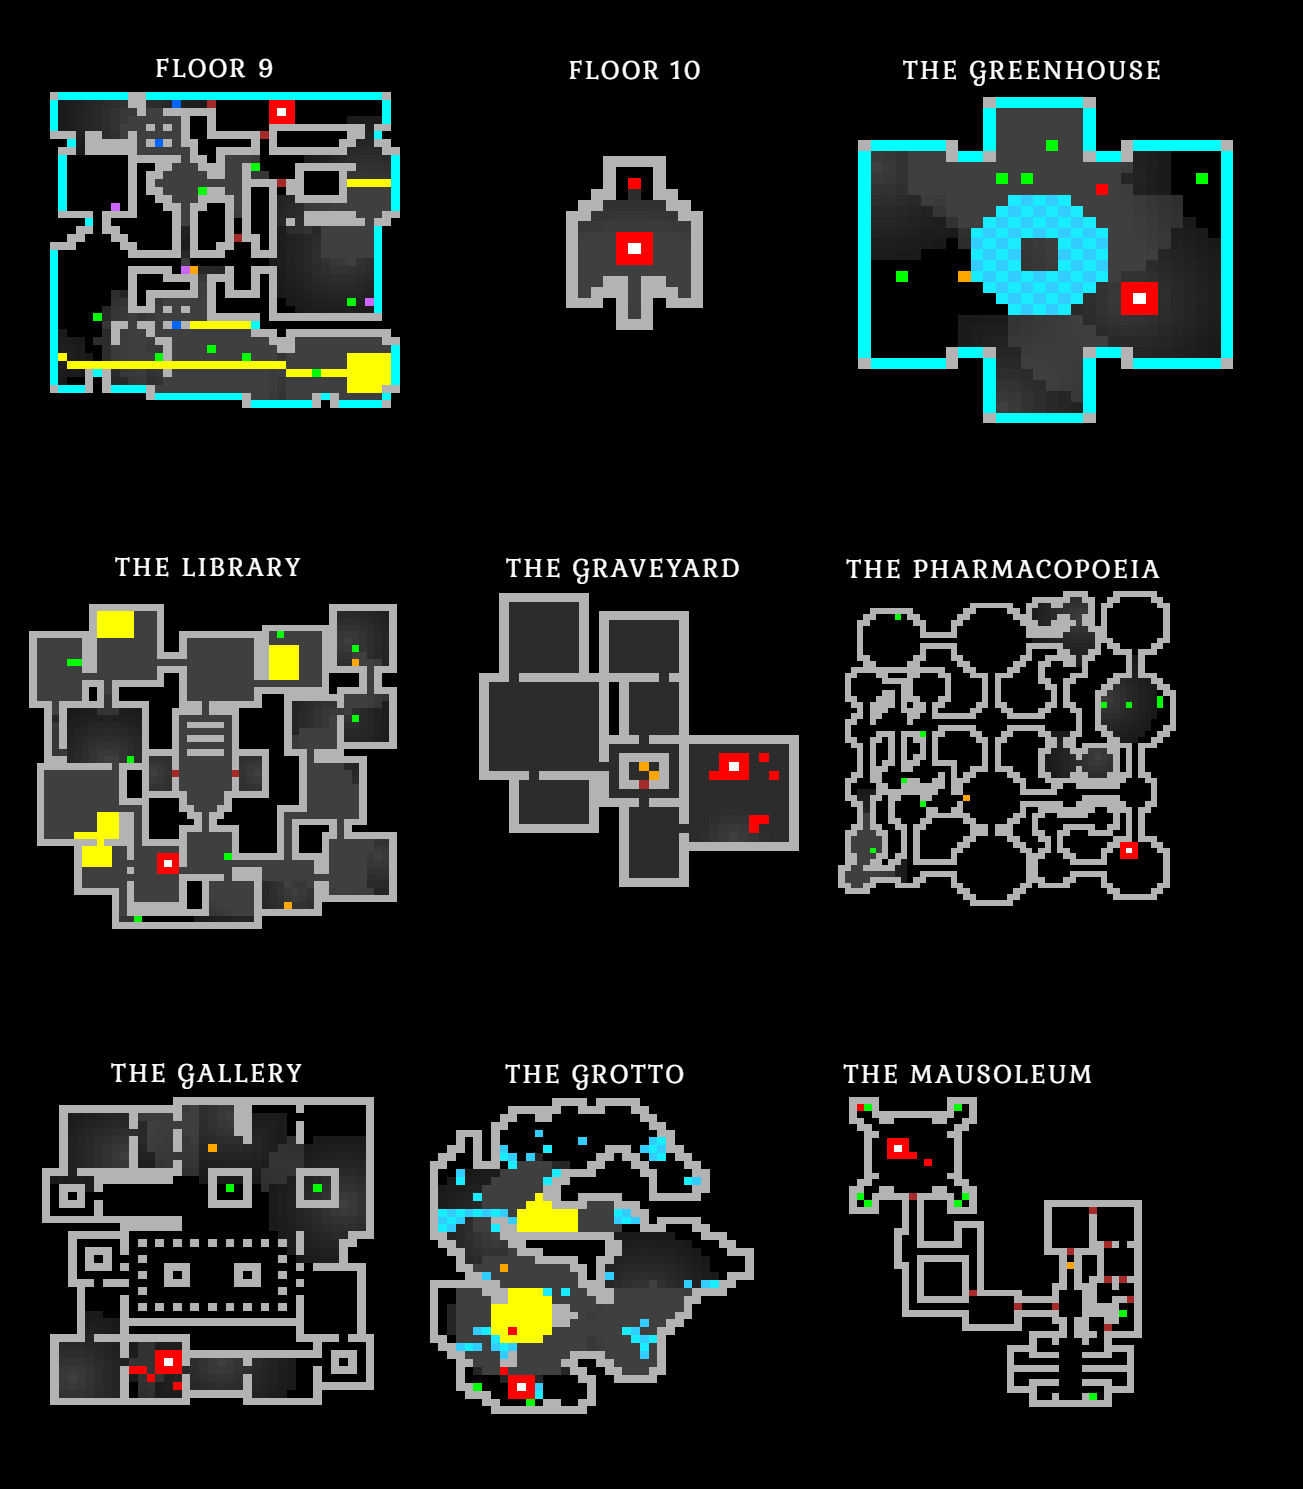
Now the Pharmacopoeia has circular chambers. The Greenhouse has flowerbeds and fountains. The Graveyard has a sensible and cool looking entrance to the Mausoleum.
I have a powerful tool for controlling the theme, pacing, and drama
In my favorite roguelikes, branches are more than an extra scoop of content. They each have a central challenge that has to be solved. At the heart of that challenge is usually a special boss monster(s) and a special area to house them. Basically we’re talking about a set piece.
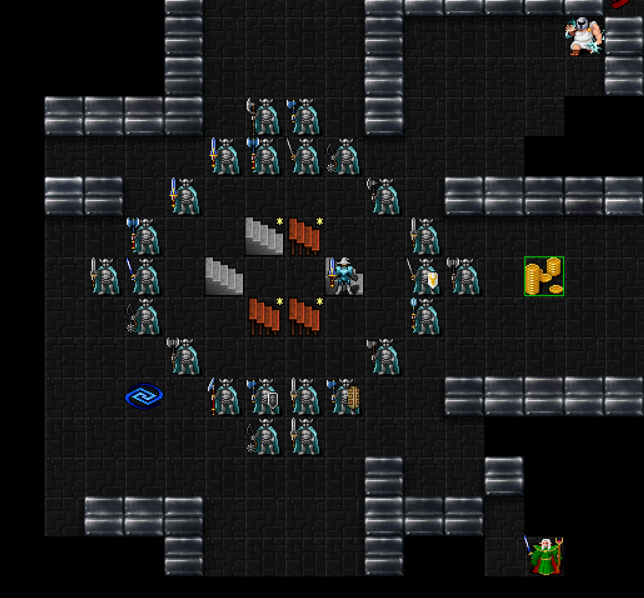
A good example is the Vaults in DCSS. As you climb down to the last level, you find yourself surrounded by dozens of vault guards standing in formation and a bunch of other high level baddies. Sometimes you’ll try to run away, but the staircases will be sealed off. It’s not just cool gameplay. This encounter in Vaults:5 actually makes it feel like you’re in a vault.
Creating such a scenario is much easier with prefabs. They let you precisely control the space (determining tactics), monsters, bosses, and environmental dangers. Even the torch light can be controlled. Here’s some examples of set pieces I’ve created using prefabs (mild spoiler warning by the way):
The boss room in the Mausoleum. It’s wide open, which is dangerous because the boss spawns more vampires. On each corner is a twisting hallway to a room filled with treasure.
The central room in the Gallery. It’s a big, rectangular room with “display cases” on both ends. It’s actually possible for the Gorgon Queen to blast open those cases on accident. Along the perimeter of the room are columns, very useful for breaking line of sight with the boss.
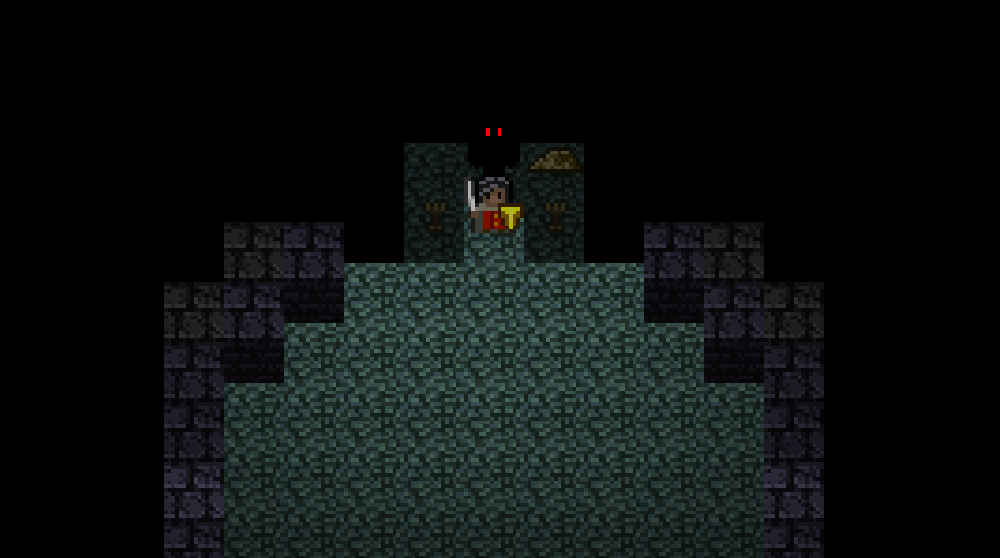
Floor 10. You approach Fane and find him enveloped in darkness. You can have the whole conversation this way, with your character in the light and his in the dark. METAPHOR MAYBE? On both sides of you are torches, which can be lit simultaneously if you desire. Interestingly enough, torches are never generated that close together normally because it creates an ambiguity in which to light. I’m so damn happy with the dramatic flair this scene adds.
Mazes
One last bonus: mazes are easily generated using a single tiny prefab. And yes, the game will eventually have a maze!
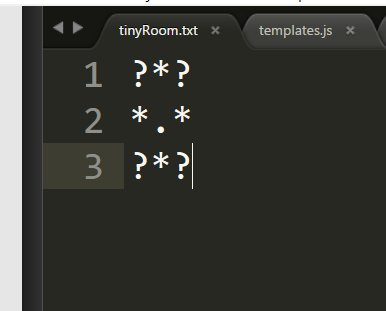
“Text files are nature’s most perfect fruit.” – Jim Shepard (Dungeonmans)
The process
- Load prefabs. Each prefab is stored in a plain old text file. Make a connection object for each “*” found, saving its relative location and directional facing.
- Generate “auto-rooms”. Since the entire generation is now dependent on prefabs, I generate a bunch of rectangular floors and save them as if they were real prefabs. I’m sure there’s a better way to do it, but this works. Other shapes could be generated this way too, but are more difficult to get right.
- Grab the level configuration. With this last release, I finally found all the scattered configuration code and put it into level config files. Super useful!
- Pick a starting prefab. The starting prefab will often be the important “set piece” of a branch, though any ordinary prefab can also be picked if none is specified in the configuration.
- Place the prefab on the map.
- The classic ASCII symbols like #.~> (wall, floor, water, stairs)
- ? for “don’t care”. Usually ends up being a wall (the default tile type), but this allows flexibility in overlapping prefabs.
- 0-9 can map nicely to 10 values without needing 10 case statements. I reserved these for floor type. For example, in the greenhouse, the default floor is grass, but I also mix in stone walkways and flowerbeds.
- Randomly pick a new prefab from the list of prefabs defined in the current level config. And also pick one of the existing prefabs on the map to connect to.
- Starting from a random connector, extend a hallway out. First the hallway is made as long as desired and then scaled back incrementally until the prefab fits on the end of it. It’s possible for hallways to be 0 length, if the level config allows for that. If it doesn’t fit, just scrap this hallway/prefab and move on.
- Jump back to step 5. Keep going until enough prefabs have been placed on the map or we’re timed out.
- Now that all the prefabs are placed, we want to enable more connections to minimize backtracking. There are three types of connections made:
- Any connector that is flanked on both sides by floor can be made into a floor or door.
- If two connectors face each other, a hallway can be dug between the two.
- Two perpendicular connectors can meet through a L-shaped hallway.

A few remnants from the old system still remain. Some of the levels are generated using the old algorithm, just to increase the overall variety. Finally, many levels are expanded by randomly placing down rooms over the existing ones in order to make the levels more open (and more dangerous).
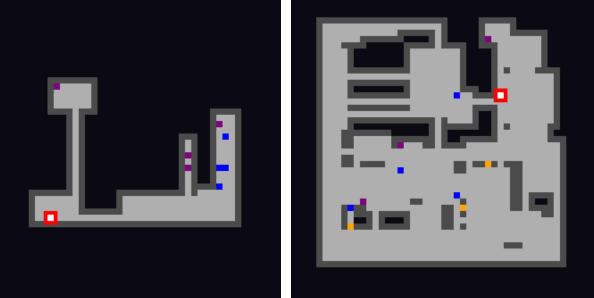
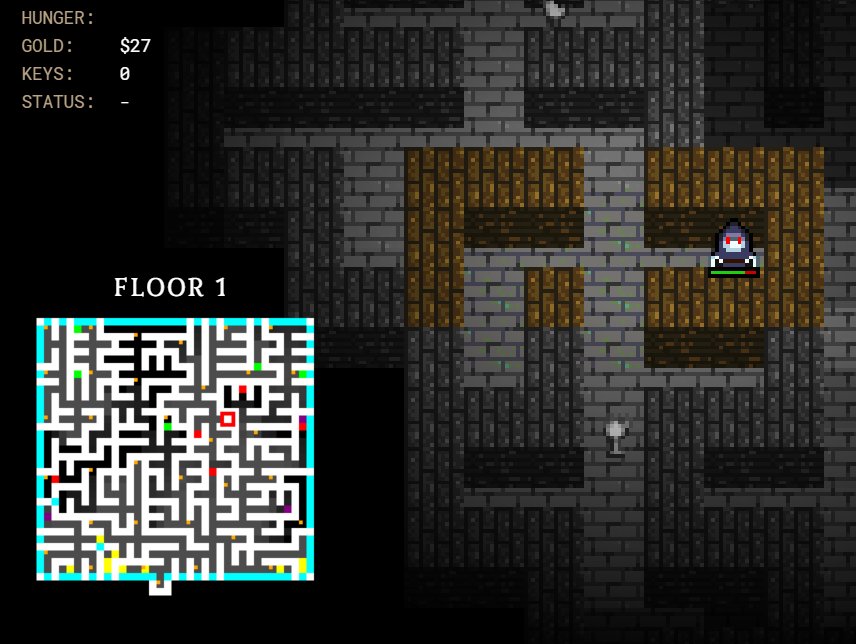
All in all, the minimap is looking quite different these days.